A Classic Bulb offered from €100 purchase 🎁 !

First of all, only certain types of mate gourds need to be cured before first use: gourds made of squash, wood, or bamboo. So, if you have a metal or glass gourd, you can already prepare a mate.
Did you just buy a gourd and some mate for the first time? Congratulations!
But don't forget that if you chose a natural mate gourd, made of squash, you need to clean it before its first use. This is called "curing your mate gourd" or "curing your mate".
So, a little patience before making your first mate.
The mate gourd must be cleaned before its first use for three reasons: hygiene, the taste of mate, and the protection of the gourd.
The squash is a porous material - curing it seals the pores and thus makes the container airtight and durable.
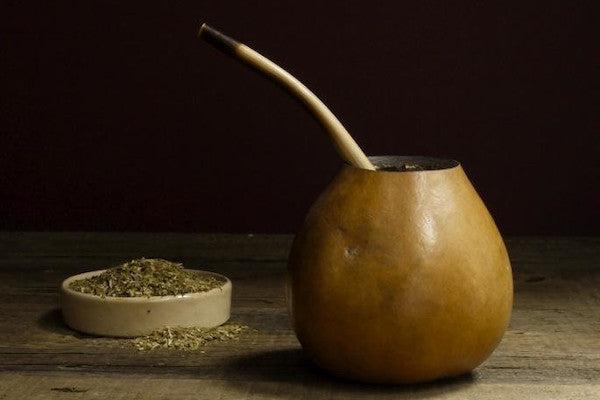
The gourd is hollowed out of a squash, the fruit of the gourd plant.
Before being cured, it is filled with small dried pieces, giving it an unclean appearance.

Before/After
Curing the gourd allows you to clean it by removing all the impurities that can be found inside.
An uncured (or poorly cured) mate gourd affects the taste of mate.
So if you want to make a good mate, be sure to properly cure your gourd.
Curing your gourd helps waterproof it, making it a bit less fragile.
Indeed, a poorly cured mate gourd can easily mold.

Moldy mate gourd
So now that you know why you need to cure your gourd, here’s how to do it properly with this little tutorial.
In South America, there are many techniques depending on habits and cultures. The method presented here is the most common.

Take some yerba mate, and fill your gourd three-quarters full.

Next, pour very hot water to the brim (just below the metal rim). Be careful that the metal part is not submerged, or it may detach from the gourd.
In a few minutes, the water will be absorbed by the mate leaves.
Then, wait a few minutes and refill with water to the brim, then let it sit for 24 hours.
Throw away (or compost) what is inside your gourd.

Then, scrape the inside with a solid object (like a metal spoon) to remove all the residues inside.
Do not hesitate to scrape hard, while being careful not to break the wall or the central stem.
There is a good chance that residues are still in the gourd, so rinse your gourd and scrub several times... Until the inside is nice and clean.

Once clean, dry the inside of your gourd with absorbent paper.
After absorbing most of the moisture (during the previous step), dry your gourd right side up.
Be careful, you should never dry your gourd upside down for two reasons:

Once dried, your gourd is ready for use. It is recommended to repeat this process several times to ensure the gourd is completely cleaned. Ideally, you should clean your gourd at least 3 times.
But be careful, just because you have cleaned it doesn't mean there's nothing more to do.
Gourd and wooden gourds require special care.
Cleaning the gourd (also referred to by some as "breaking in the gourd") is the first step before using a gourd.
But to ensure a long lifespan (and avoid the nightmare of every mate drinker: that the gourd molds), it is important to properly maintain your gourd.
Here are some maintenance tips:
To learn more (recommended): How to maintain your mate gourd
As you use them, natural gourds can change color. This is completely normal, it is not mold.

This is due to prolonged contact with water, air, and yerba mate.
On the other hand, a gourd that has not been dried properly and shows white spots is probably starting to mold. If this is the case, you must immediately stop using it and try to recover it.
For this, there are a few methods. They do not work in all cases (some gourds are too affected to be restored).
Learn more: Moldy gourd - How to save your gourd?
The traditional mate gourd - made of gourd - is a beautiful object. But it is true that its use can be cumbersome, especially when one has only recently started drinking mate.
In this case, it is often recommended to use mate pots made of stainless steel, as they require no special maintenance and cannot mold, unlike gourd mate pots.
Discover our stainless steel mate gourd. Available in white and black, it is the ideal object for drinking mate traditionally without having to worry about maintaining your gourd. It is a tried and tested model: over 30,000 people have purchased this gourd since its launch.

